Install VMware PowerCLI
VMware regularly releases updates to its Powershell module, known as PowerCLI. While in the past you had to go to the vmware.com website, download the executable - by the way, you still can for older versions - and install PowerCLI, you no longer have to since there’s an easier way directly from a PowerShell console.
If you do have an older version that was installed via an executable installer, please uninstall it via Apps & features under System Settings before proceeding with the examples shown here.
Checking PowerShell Version
There is a requirement for installing PowerCLI, and that is to have, at a minimum, PowerShell 3.0 installed. If you have the latest Windows 10 release, you will have no problem installing it. If you need to verify the version installed on your system, run the following command and look for the PSVersion in the output:
$PSVersionTableThe text will be the output you should see:
PS C:\> $PSVersionTable
Name Value
---- -----
PSVersion 5.1.18362.145
PSEdition Desktop
PSCompatibleVersions {1.0, 2.0, 3.0, 4.0...}
BuildVersion 10.0.18362.145
CLRVersion 4.0.30319.42000
WSManStackVersion 3.0
PSRemotingProtocolVersion 2.3
SerializationVersion 1.1.0.1
The installed version on my machine is PSVersion 5.1.18362.145 or simply 5.1, as highlighted on line 4.
How To Install PowerCLI
Run the following command to install the latest version of PowerCLI.
Install-Module VMware.PowerCLIIf you need to install a specific version of PowerCLI, you may run the following:
Install-Module -Name VMware.PowerCLI -RequiredVersion 10.1.1.8827524To list all the versions available for install, type the following:
Find-Module -Name VMware.PowerCLI -AllVersions | Format-Table -AutoSizeUninstall PowerCLI
To uninstall PowerCLI, type the following command to include all available versions of the module:
Get-Module -Name VMware* -ListAvailable | Uninstall-Module -ForceConnect to VMware vCenter Server using PowerCLI
First, let’s save our credentials to a temporary variable by typing the following:
$cred = Get-CredentialYou should see an authentication dialog box. Enter your credentials.
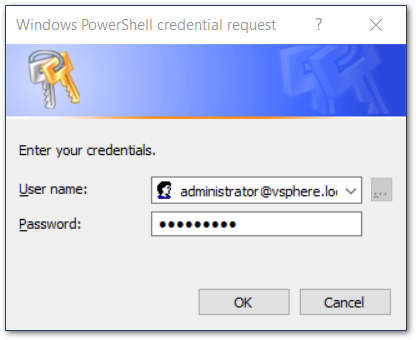
By creating a temporary variable that stores your credentials, you can log in to multiple vCenter Servers or reuse it to login again if you lose your connection to vCenter Server.
Next, type the command below and subsite the name of your vCenter Server. The example here includes the name of my vCenter Server, vcenter.virtual.local.
Connect-VIServer -Server vcenter.virtual.local -Credential $credIf you connect successfully, you will see the following output showing the name of your vCenter Server.
PS C:\> Connect-VIServer -Server vcenter.virtual.local -Credential $cred
Name Port User
---- ---- ----
vcenter.virtual.local 443 VSPHERE.LOCAL\Administrator
Running Basic CMDLETs
Now that you’ve connected successfully, let’s run the following cmdlets:
Get-DatacenterGet-ClusterGet-VMHostGet-VMGet-DatastoreAs you can see, those basic cmdlets retrieve a lot of useful information on your environment.
Enjoy learning PowerShell.