How to Uninstall MSI Using PowerShell and an RMM
Now and then, you come across the need to remove an application either by doing an MSI Uninstall or EXE uninstall. While you can manually uninstall an application one by one for a small number of computers, if you have multiple computers, from a few to hundreds, it’s not practical to visit every machine either in person or remotely, not to mention coordinate time with the end user. You’ll need a quick way to uninstall the software, and one of the quickest ways is to use PowerShell.
The Problem
This particular problem I came across was for removing Adobe Acrobat Pro 2017 but will work for everything where an MSI was used. While the installer used an EXE, the software folder contained an MSI installer once the software was installed. To our surprise, we realized that Adobe had packaged the MSI within the EXE installer, making our removal process easy to do. Not all companies will do this, but I suggest you look at the installed application folder within your C drive or wherever you installed your application and look for an MSI file. It will save you a ton of time trying to remove it if you find it and test its removal process.
The Fix(es)
While you can deploy this fix in multiple ways using GPO, SCCM, an RRM tool, etc., I’ll focus on the following methods: Using only Powershell and N-Able’s RMM (new name as of 2022 is N-able N-sight).
To ensure we can use this method, we’ll run a Powershell command to retrieve all the software recognized by the command on the system, and if the software title is in the list, we can proceed with the next step. If the software title does not appear, this method will not work for you.
Fix # 1: Pure Powershell 5
First, we will get a list of all the software installed on our selected test machine where we know the software is installed. Please run the following code below and find the exact name of the software we’re trying to uninstall.
Get-WmiObject -Class Win32_Product | select name | sortYou’ll get the following output:
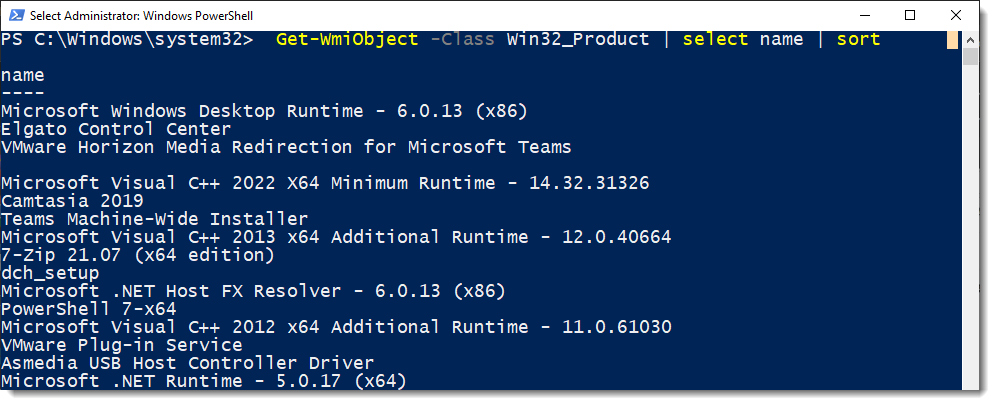
Now that we have the exact name of the software title type it into the line below by replacing the “Your_App” text.
 $app = Get-WmiObject -Class Win32_Product -Filter "Name = 'YOUR_APP'"
 $app.Uninstall()
That’s it. The software title should now be uninstalled.
Example of what the script looks like in Notepad. Notice the single and double quotes for the name.

Fix # 2: Pure Powershell 7
Again, we’ll run the following code to get a list of software but this time using Powershell 7.
Get-WmiObject -Class Win32_Product | select name | sortWhich produces a similar list as above under Powershell 5 but notice there are some differences under Powershell 7. I suspect Microsoft made changes in this updated cmdlet for improved recognition of installed software.
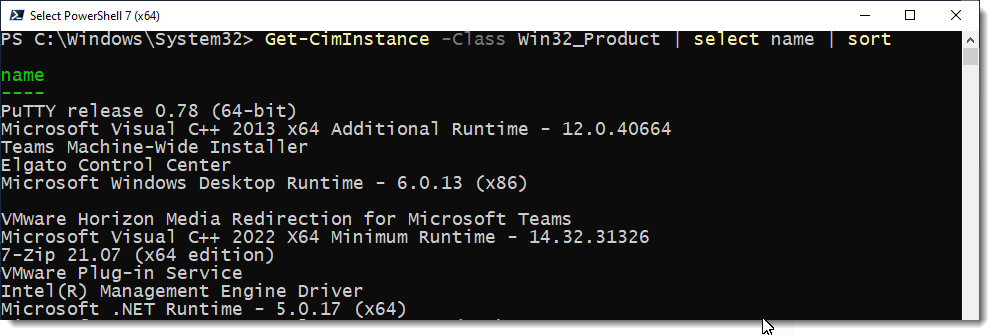
Again, now that we have the exact name of the application from the output, copy that and replace the ‘YOUR_APP’ text below.
 $app = Get-CimInstance -Class Win32_Product -Filter "Name = 'YOUR_APP'"
 $app.Uninstall()
That should uninstall the application.
Fix # 3: PowerShell with N-able N-sight RMM
Sure, the above works for one or a few machines if you are doing it manually. But what if you are an MSP and need to do this for an entire office or multiple companies? Now you need to be able to target entire departments, divisions, or companies, and doing it one at a time isn’t going to cut it.
Using the same steps found in Fix # 1 above, we’ll take this further by bringing our script into our RMM and targeting multiple computers simultaneously.
- Copy in the solution from fix # 1 or fix # 2 depending on what version of Powershell you know is deployed within the environment you’re targeting.
- Paste the script into your favorite script editor and save it with a “.ps1” extension.
- Login to your RMM, in this case, it’s N-able N-sight.
- Go to Settings, Script Manager
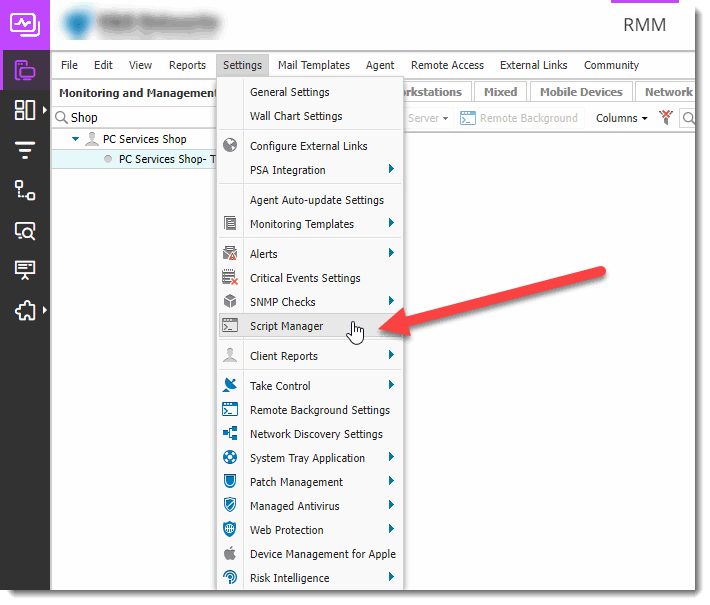
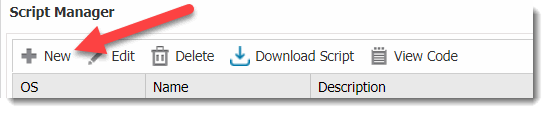
- Click New to create a new script.
- Give your script a name, and description, leave the Default Timeout at its default value, and select the Automated Task and Windows checkboxes.
- Upload the script you saved in step 2 by clicking the browse button.
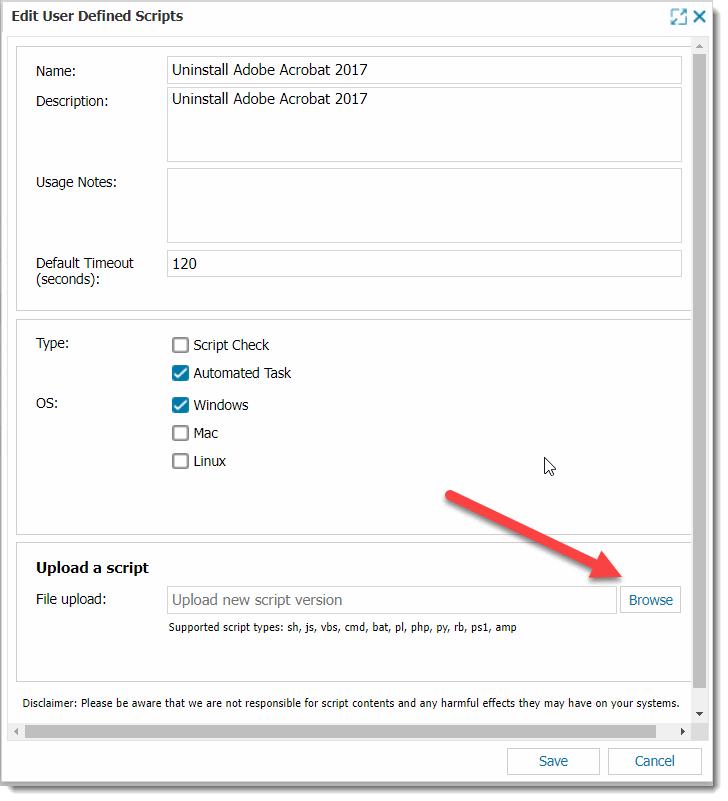
- Click Save.
- Assign the script as a task at the Client or Site level to target multiple computers, or assign the task to individual machines.
Summary
The beauty of this solution is that it’s a two-liner PowerShell Script. Technically, I could’ve rewritten it to be a one-liner, but this way is clean and obvious what the script is doing.